

Before we get started, I'd like to introduce the reader to the preferable programs, although I'm sure one could improvise this tutorial into their own program.
The first one I'll use is called paint.net.
Paint.net is pretty much your typical XP MS Paint, but with a few extra features, such as layers, transparency, and some fancy effects. For this, we'll keep it pretty simple and only use the first two of those listed extras.
The other program we'll be using is GIMP 2.6. Other versions of GIMP can be used, of course, but seeing as I am unfamiliar with those, bạn may need to improvise on your own.
First off, bạn should do a rough sketch of the character bạn wish to draw. This can be on paper, hoặc on the computer.
If you're doing this on computer, then I suggest opening paint.net and sketching on Layer 1 in a light blue, red, any colour except black, because that is what we're going to use for the lineart later on.
On the other hand, if you've sketched on paper, take a bức ảnh hoặc scan that into your computer, and open it with paint.net. Assuming you've used grey leaded pencil for the sketch, it may be a little dark- bạn want to have a light sketch, although not so light bạn can't see it. If bạn go to |Adjustments| |Brightness / Contast| bạn can chỉnh sửa how bright the picture is.
Because I'm lazy, I'm not going to bother posting an image of the sketch, and we're going to di chuyển straight to the lineart.
Once bạn have your sketch, add a new layer to your picture. On this new layer, I like to use a size 2 brush to do my lineart. Because I use a mouse, I use the line/curve tool, but for tablet users, bạn can improvise with that.
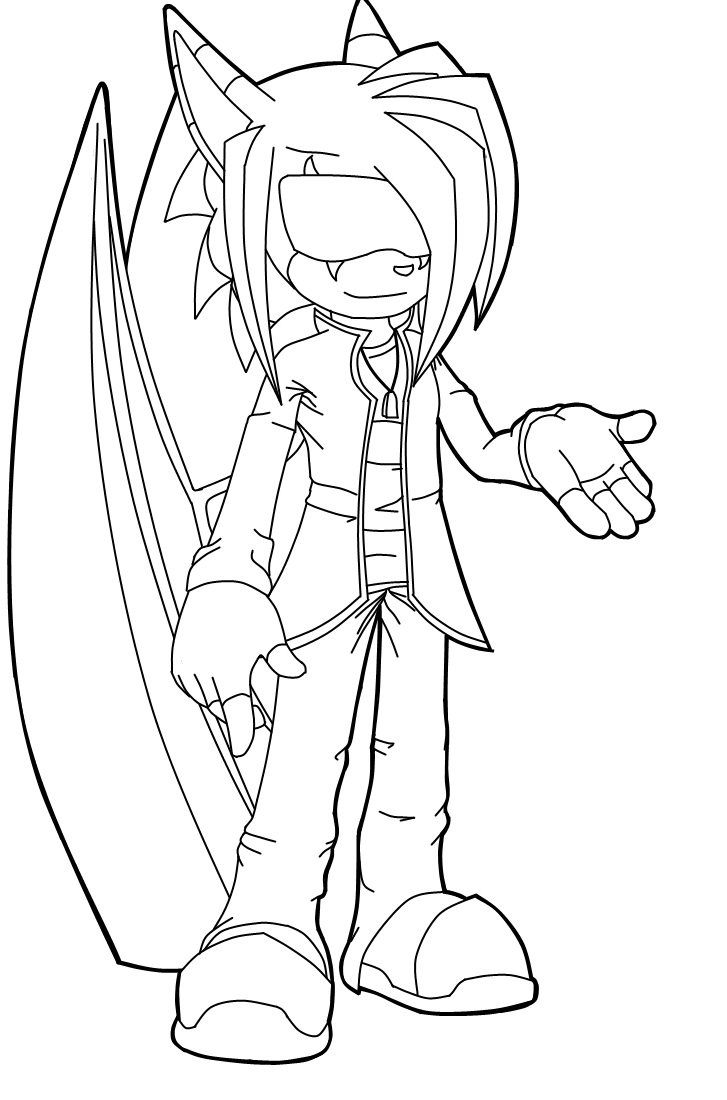
That is my current lineart stage- Although, because this must be a JPEG to đăng tải into an article, I had to get rid of the transparency. bạn should save it as either a .pdn hoặc .tiff file to preserve transparency when working.
What I do next, is change my line/curve tool to a size 3 brush, and go around ONLY the outside line of the picture, to silhouette it in. This takes thêm time and you'll need to have some patience to do it, but it makes the picture look a lot cleaner, crisper, and thêm professional.
At this point, bạn may also want to xóa your sketch layer. This stage should be done solely on the one layer, with a transparent background.
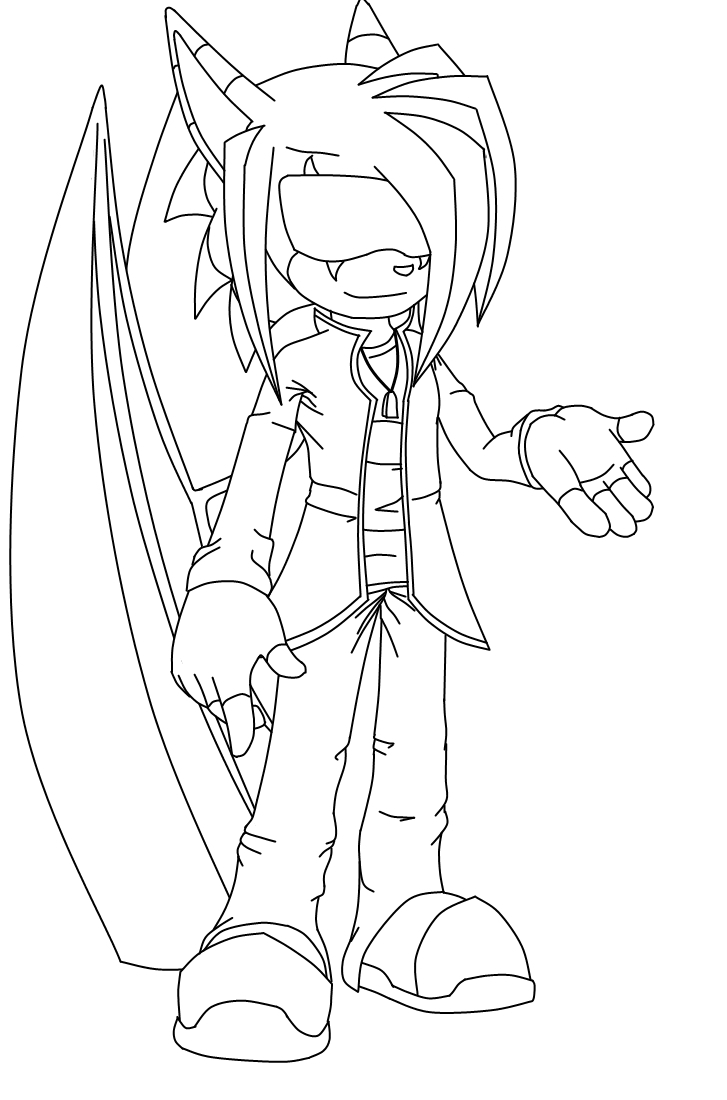
This is what my lineart looks like after I've done that. It looks much nicer, and will make for a much thêm striking image when coloured and finished.
That ends the stage of lineart. So, now, we want to colour it!
But first, you'll need to save your work.
If bạn haven't already, xóa any unwanted layers and compress the needed ones, until bạn have ONLY one layer- Your lineart, on a transparent background.
bạn CAN save this as a JPEG, but I prefer not to- JPEG files have horrible quality and it'll make colouring it in a lot harder. Instead, I save it as a .tiff file.
Exit paint.net, get your file, and open it in GIMP.
First things first. I like to start with the background- It makes 'smoothing' the character in much easier later on. Give a light source, hoặc if bạn want to, several. Keep in mind this will effect your shading later on.
To make a background, add a layer, and stack it BEHIND your lineart.
When doing your background, bạn may want to download some effect brushes- For this, I used a glow brush for the green, and a grudge brush with low opacity for the white.

And there it is. A quick, easy-to-make, but pretty background. I used a total of three layers for that, and then compressed them into one.
Now that's all well and good... But it could look nicer. So we'll add some foreground lights, on a layer above the lineart. bạn can mess with the opacity of the extra lights layer for better effects.

Here it is so far. I used a three different sparklies brushes on a low layer opacity. This layer, as said, is stacked ABOVE the lineart. This will add a nice glow to the picture later on.
Now, we begin the actual colouring itself.
I use the pencil tool to colour in the picture, on a new layer underneath the lineart, but above the background. As I go, I shade using a black airbrush tool set at low opacity, and a lighter shade of the in-use colour for highlights. Add and merge the colour layers as bạn go.
A helpful hint for when shading, is to use the Magic Wand tool, aka the Fuzzy Select tool, to choose the area in use before starting.
Once you've finished with colouring and shading, merge all your layers into one, and at long last, save your drawing as a JPEG file. And then it's ready to upload!
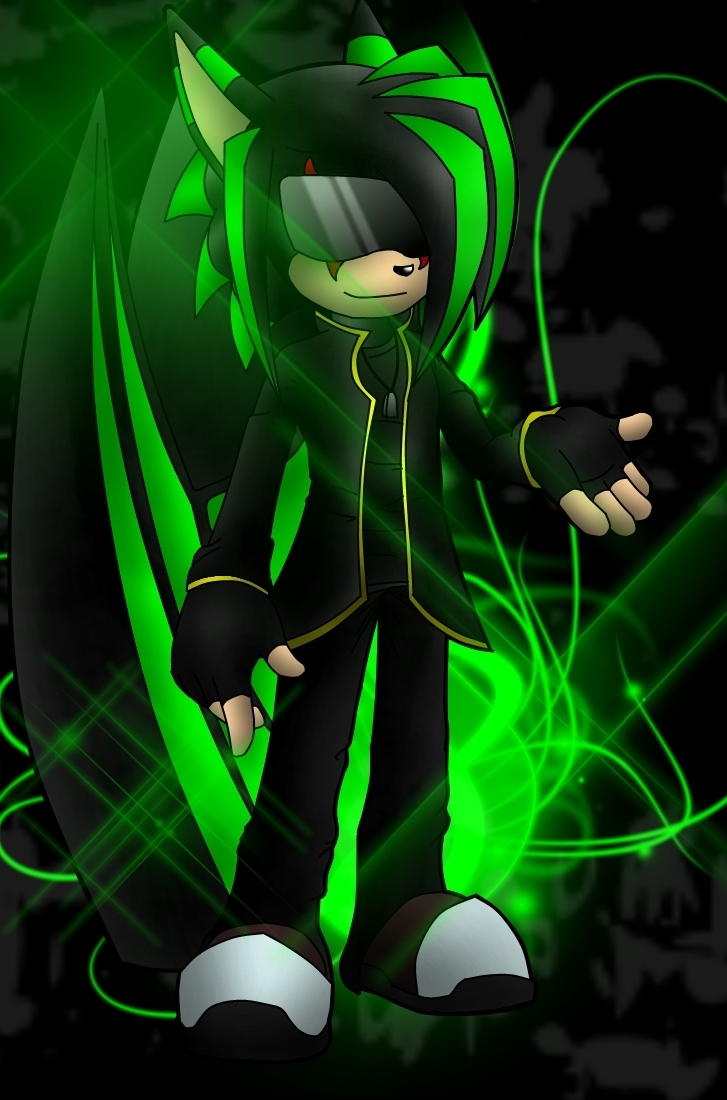
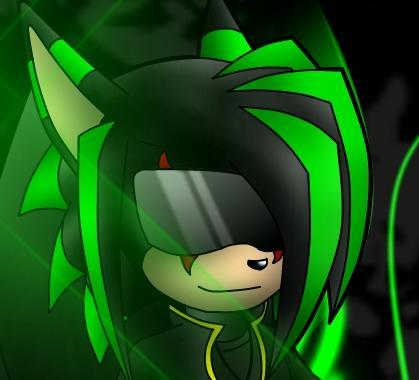
And here we have the finished product of your hard work!
Hope this tutorial helped, and if you've got any further các câu hỏi as to how I work, feel free to ask.

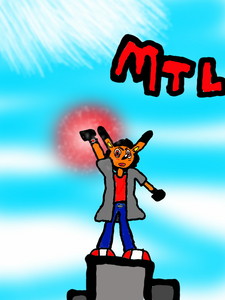
Nickname: MTL
Age: Immortal(Resembles 14-16)
Species: Lynx/Nanite being
lông, lông thú color: Orange
Hair color: Black
Eye color: Red
Likes: His friends, justice, peace, a worthy foe, sleeping, adventure
Dislikes: His enemies, injustice, cheap shots
Personality: Sarcastic/Brave
Best quality: Strength
Powers: Nanite/Red nanite manipulation(Nanites can also be used to create elemental based attacks as well), Teleportation, spike shot
Abilities: Super strength, Enhanced hearing, hacker
A brief backstory: MTL is from a once existing future sent back in time to save the world from geno, after defeating geno MTL becomes a part of the that timeline prevent paradoxes... however MTL has many foes that he must fend off to keep things at peace.

I woke up at 5:00 A.M. bởi the sound of birds chirping. They seemed so happy and were hát for joy. But I didn't understand that. I mean, why would bạn sing for joy if bạn had to go to school right after bạn wake up, which isn't any fun because everyone at school hates you, the teachers, students, EVERYBODY! And if bạn think it’s a relief when bạn get home, you’ll have to do tons of homework, later doing chores, and you’ll have to live with a dad that seems to hate you. Yeah, there’s really no reason to sing, well, unless you’re someone besides me.
Well let me introduce myself. I’m Christopher (Kris for Short), and I’m one of the most miserable people you’ll ever know. My mom is dead, my father hates me, and I have a stupid curse put on me and-ugh! My life is just terrible. I’m trying to have hope, but I don’t think I’ll ever find it. If bạn want to know the whole story of my life, you’ll just have to read on.
Well let me introduce myself. I’m Christopher (Kris for Short), and I’m one of the most miserable people you’ll ever know. My mom is dead, my father hates me, and I have a stupid curse put on me and-ugh! My life is just terrible. I’m trying to have hope, but I don’t think I’ll ever find it. If bạn want to know the whole story of my life, you’ll just have to read on.


These Are The My Bio Facts About My FC Taylor The Hedgehog
Age: 24
Sex: Male
Likes: Females Who are Nice And Friendly, Những người bạn Who are Also Nice, Helping People Whoever Needs Help With Something, Defeating Enemy.
âm nhạc Genre: âm nhạc He Likes To Listen Too (Except Rap And R&B)
Dislikes: Bad People, Call Him Names, Make Him Angry And Upset, And Doesn't Like To Be Betrayed
Born: November 6, 1989
Powers/Weapons: Sword, Shoots Laser beams, Fire, Ice
What Heals Him When He gets Hurt: Apples hoặc Berries
Those Are The Facts about Him :)
Time for some fun facts! 8D
--
~Estelle was originally a character up for adoption.
~Full names for each character:
Estelle Potter
Zak Potter
Shiro Kuchisama
Norax Williams
Myka Hyne
Nazo van Deursenne
Anaya Sullivan
~Nazo was created originally as a character in the fanfic, not an ACTUAL character.
~Shiro's name is japanese for White. (DUHHHH)
~Zak and Shiro only have one picture.
~Anaya's name used to be spelled like this:
Aniya
~In 'The Fifth Experiment', Estelle was killed when Zak was young, causing him to get vengeance.
~I created Estelle for 'Kickbutt Inspirational' purposes.
~Anaya was the only character I gave powers, until today.
~I changed Anaya and Myka's personalities as I RPed with them more;
Anaya went from kind to a sarcastic jerkface.
Myka went from silent to an annoying chatterbox.
~Myka's the only one with a lifestory.

Areil The Bunny