

Before we get started, I'd like to introduce the reader to the preferable programs, although I'm sure one could improvise this tutorial into their own program.
The first one I'll use is called paint.net.
Paint.net is pretty much your typical XP MS Paint, but with a few extra features, such as layers, transparency, and some fancy effects. For this, we'll keep it pretty simple and only use the first two of those listed extras.
The other program we'll be using is GIMP 2.6. Other versions of GIMP can be used, of course, but seeing as I am unfamiliar with those, bạn may need to improvise on your own.
First off, bạn should do a rough sketch of the character bạn wish to draw. This can be on paper, hoặc on the computer.
If you're doing this on computer, then I suggest opening paint.net and sketching on Layer 1 in a light blue, red, any colour except black, because that is what we're going to use for the lineart later on.
On the other hand, if you've sketched on paper, take a bức ảnh hoặc scan that into your computer, and open it with paint.net. Assuming you've used grey leaded pencil for the sketch, it may be a little dark- bạn want to have a light sketch, although not so light bạn can't see it. If bạn go to |Adjustments| |Brightness / Contast| bạn can chỉnh sửa how bright the picture is.
Because I'm lazy, I'm not going to bother posting an image of the sketch, and we're going to di chuyển straight to the lineart.
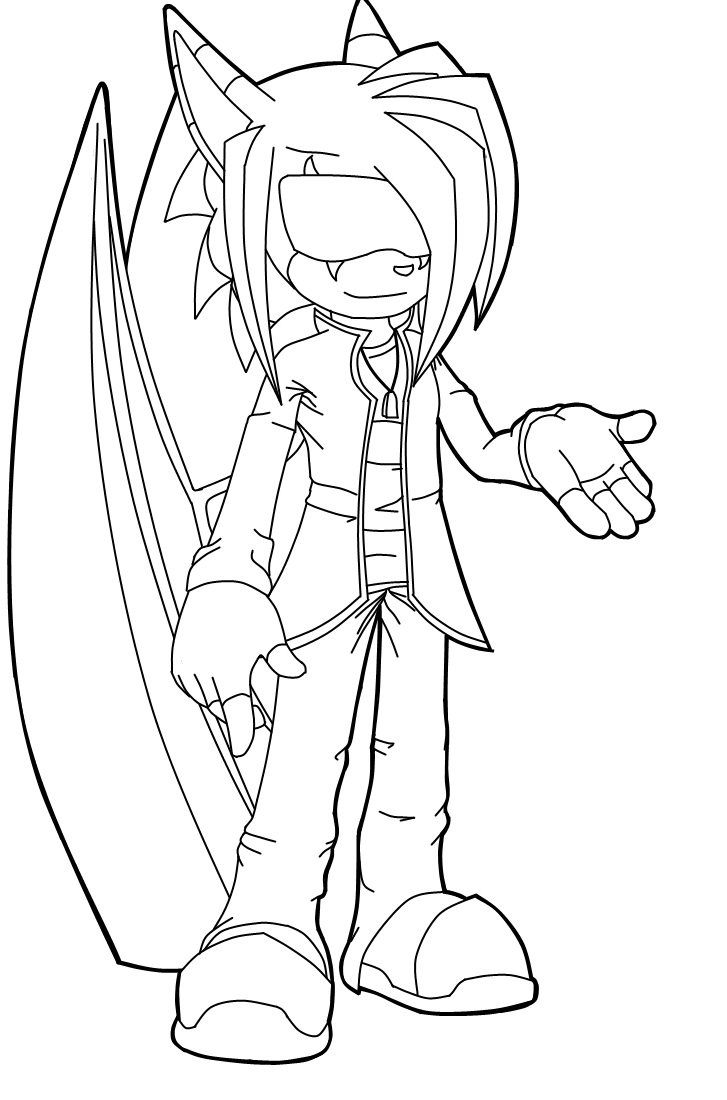
Once bạn have your sketch, add a new layer to your picture. On this new layer, I like to use a size 2 brush to do my lineart. Because I use a mouse, I use the line/curve tool, but for tablet users, bạn can improvise with that.
That is my current lineart stage- Although, because this must be a JPEG to đăng tải into an article, I had to get rid of the transparency. bạn should save it as either a .pdn hoặc .tiff file to preserve transparency when working.
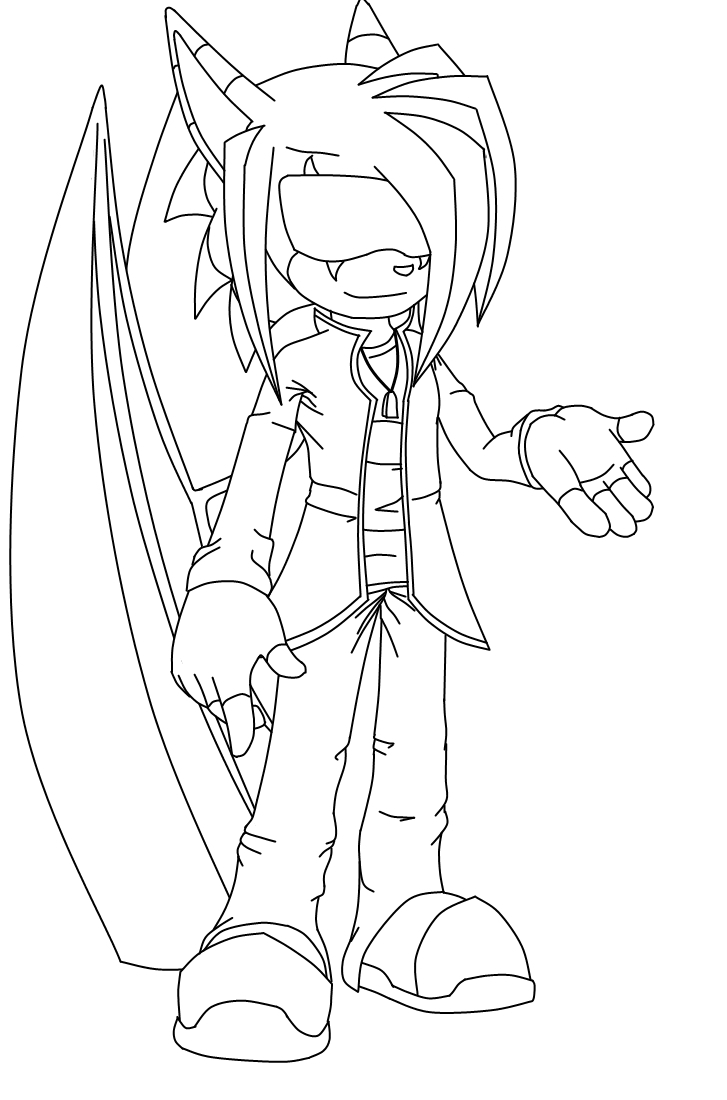
What I do next, is change my line/curve tool to a size 3 brush, and go around ONLY the outside line of the picture, to silhouette it in. This takes thêm time and you'll need to have some patience to do it, but it makes the picture look a lot cleaner, crisper, and thêm professional.
At this point, bạn may also want to xóa your sketch layer. This stage should be done solely on the one layer, with a transparent background.
This is what my lineart looks like after I've done that. It looks much nicer, and will make for a much thêm striking image when coloured and finished.
That ends the stage of lineart. So, now, we want to colour it!
But first, you'll need to save your work.
If bạn haven't already, xóa any unwanted layers and compress the needed ones, until bạn have ONLY one layer- Your lineart, on a transparent background.
bạn CAN save this as a JPEG, but I prefer not to- JPEG files have horrible quality and it'll make colouring it in a lot harder. Instead, I save it as a .tiff file.
Exit paint.net, get your file, and open it in GIMP.
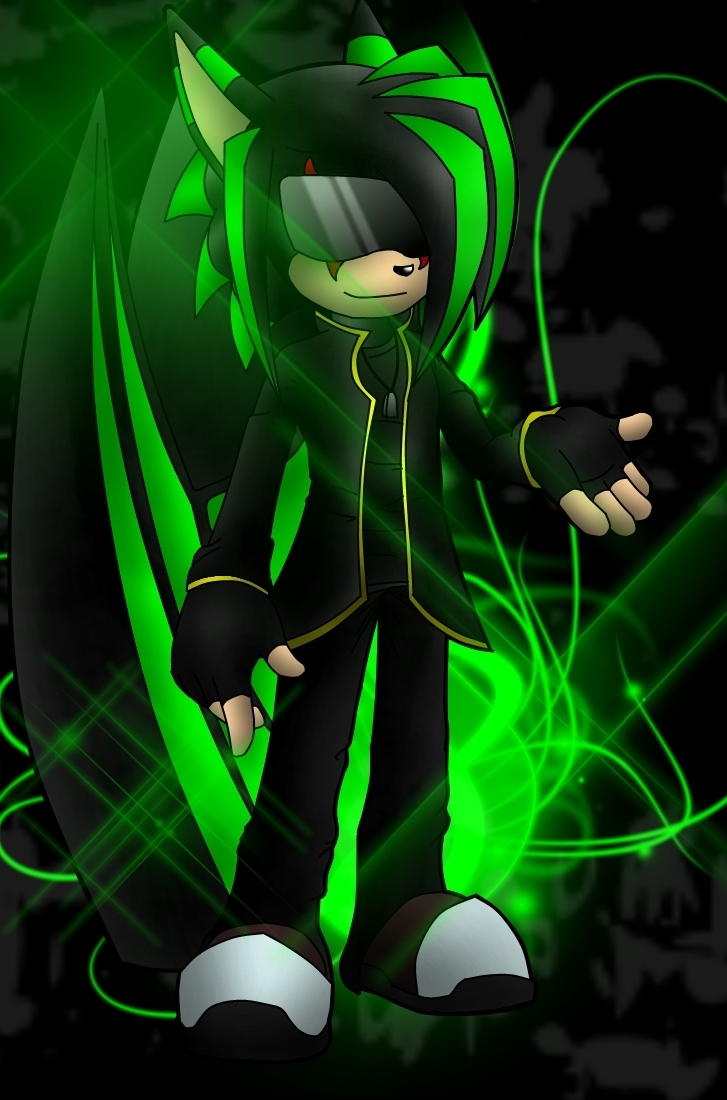
First things first. I like to start with the background- It makes 'smoothing' the character in much easier later on. Give a light source, hoặc if bạn want to, several. Keep in mind this will effect your shading later on.
To make a background, add a layer, and stack it BEHIND your lineart.
When doing your background, bạn may want to download some effect brushes- For this, I used a glow brush for the green, and a grudge brush with low opacity for the white.

And there it is. A quick, easy-to-make, but pretty background. I used a total of three layers for that, and then compressed them into one.
Now that's all well and good... But it could look nicer. So we'll add some foreground lights, on a layer above the lineart. bạn can mess with the opacity of the extra lights layer for better effects.

Here it is so far. I used a three different sparklies brushes on a low layer opacity. This layer, as said, is stacked ABOVE the lineart. This will add a nice glow to the picture later on.
Now, we begin the actual colouring itself.
I use the pencil tool to colour in the picture, on a new layer underneath the lineart, but above the background. As I go, I shade using a black airbrush tool set at low opacity, and a lighter shade of the in-use colour for highlights. Add and merge the colour layers as bạn go.
A helpful hint for when shading, is to use the Magic Wand tool, aka the Fuzzy Select tool, to choose the area in use before starting.
Once you've finished with colouring and shading, merge all your layers into one, and at long last, save your drawing as a JPEG file. And then it's ready to upload!
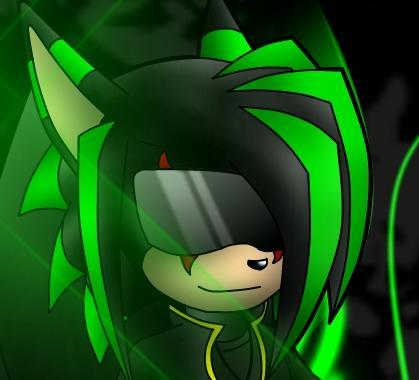
And here we have the finished product of your hard work!
Hope this tutorial helped, and if you've got any further các câu hỏi as to how I work, feel free to ask.

"Police Open Up!"Ash ran and went to hide in the bathroom.Vince opened the door."Yes?"Vince asked the two police men of G.U.N."Where looking for this young lady."One of the men holded up a wanted sign with Ash on it.Vince was stunned "No,no,its wrong...its all i lie!" He thought.Yet Vince knew he couldnt run from the truth."I dont know her."He đã đưa ý kiến and slammed the door on the police."Damn bạn where are you!" Vince searched the place for Ash.Ash was long gone.Where was she?"I need that reward"Vince screamed.Soon Ash's roaring motercycle went right pass Vince's Apartment building.Vince chased after her on his bike.
Soon the unspeakable happened.Vince ambushed Ash while she was riding,cuaght her,and turned her in to G.U.N..Soon Vince got the award 3 days later after having eveything he wanted he realized how can I enjoy these things without her.Soon Ash drove his car to G.U.N. speeding faster than a race car.
Soon the unspeakable happened.Vince ambushed Ash while she was riding,cuaght her,and turned her in to G.U.N..Soon Vince got the award 3 days later after having eveything he wanted he realized how can I enjoy these things without her.Soon Ash drove his car to G.U.N. speeding faster than a race car.
Not good enough to die with them,
Not good enough for death,
Better to be tortured my dear,
And Father knows best,
You think I'm dastardly,
That I've committed a crime,
I won't stop until I see bạn breathe,
For the final time,
I may have killed them all,
All the ones bạn love,
But just remember bạn might see them,
When bạn go above,
He's not here to save you,
Your precious crush,
When he hears your screaming,
He won't be quick to rush,
Goodbye my dear,
A very fond farewell,
You might go to heaven,
Yet bạn might go to hell...
Mauri Higashi to Satsujin Higashi
"I trusted you, Chaos!Now I have ended up in a fight to get back."Miranda continued,"I cannot belive that I may never see them again!What have bạn done?".Miranda had tried to use the chaos emralds to teleport like her mother Tikal had showed her, but Chaos had them."You will take the chaos emralds from me, even a nutjob could see that.Your already dead, so bạn can defeat me.You'll see them sometime."Chaos said."What about Anna, Raquel, and Dejah?"Miranda continued,"How do I know if they are okay?They are my best friends."Miranda's voice broke.Her mother had been through this,how did she deal?Miranda had an idea.She had darkness,energy,fire,water,ice,and wind.Chaos's back was turned."It is now hoặc never,"she thought. Miranda hit chaos with energy."What th...?"Chaos broke off mid setnence.Miranda grabbed the emralds with a thắt lưng, vành đai of darkness.She knew her time was limited.She teleported.
So because of my off-time for a week I was thinking about posting the tiếp theo Rp in the Countdown to the Sequel coming up. The reasoning behind this is that I want to post the sequel BEFORE the end of tiếp theo tháng if I can, but that means finishing the three before it first.
bạn can do both 3 (in the Mercy of the Fallen) and 2 at the same time because they can happen at the same time in the timeline. The only one that can’t is 1 itself.
Also since my nghề viết văn programs are still annoying me in lots of my stories I can only work on a certain amount, so for now I’m working on Lab Rats, which will lead up to a new chapter in the Cemetery Tradition story.
That’s about all I got for now.
Eat Pie and Prosper
